AI Command Line Development Guide_Rev1.0
Revision History
Version |
Date |
Author |
Reviewer |
Description |
|---|---|---|---|---|
Rev1.0 |
2026-06-24 |
sxx |
zlc |
Initial release |
1 Introduction
This document is intended for developers using command-line workflows. It covers code retrieval, build environment setup, compilation, build artifacts, and flashing. Developers or AI tools only need this single document to complete the full development process from scratch to flashing.
2 Getting the Code
2.1 Repository
Platform |
URL |
|---|---|
GitHub |
|
Gitee |
2.2 Clone the Repository
# GitHub
git clone https://github.com/lierda-iot/CAT1.bis_OpenCPU.git

# Gitee (recommended in China)
git clone https://gitee.com/lierda-iot_0/CAT1.bis_OpenCPU.git

cd CAT1.bis_OpenCPU
2.3 Verify Directory Structure
After cloning, verify the directory structure:
CAT1.bis_OpenCPU/
├── Makefile          # Top-level build entry
├── build.bat         # Windows build script
├── components/       # Component library (base package, kernel, drivers, third-party libs)
├── config/           # Preset configuration (default.ini, iodriver.ini)
├── examples/         # User project directory (app, demo)
├── rules/            # Makefile build rules
└── tools/            # Toolchain and scripts
Confirm that components/basePkg/ contains base package directories (e.g., F6D_A, K2B_A), then you are ready to build.
3 Build Environment Setup
3.1 Windows
No additional setup is required on Windows. The SDK includes its own toolchain and can be built directly using the build.bat script.
3.2 Linux
Ubuntu 20.04 or later is recommended. Install Make, Python3, and 32-bit runtime libraries:
sudo apt update
sudo apt install -y make
sudo apt install -y lib32z1 lib32stdc++6
sudo apt install -y python3.10 python3.10-dev python3.10-distutils
Verify the environment after installation:
make --version | head -1       # Confirm make is installed, output like: GNU Make 4.x
python3 --version              # Confirm python3 is installed, output like: Python 3.10.x
file /lib32/libz.so.1          # Confirm 32-bit library exists
All three commands should produce normal output, indicating the environment is ready.
4 Build Configuration
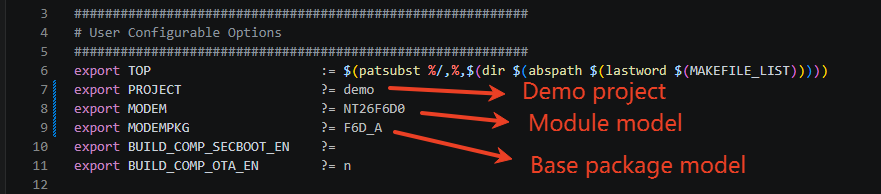
Three key variables in the root Makefile must be confirmed before building:
Variable |
Description |
Example |
|---|---|---|
PROJECT |
Project name, corresponds to a directory under |
demo |
MODEM |
Module model |
NT26F6D0 |
MODEMPKG |
Base package name |
F6D_A |
export PROJECT    ?= demo
export MODEM      ?= NT26F6D0
export MODEMPKG   ?= F6D_A
Currently supported versions and models (latest mapping available in rules/Makefile.modem):
Base Package |
Chip |
Compatible Module |
Description |
|---|---|---|---|
F6C_A |
EC718PM |
NT26F6C0 |
C series general version |
F6D_A |
EC718PM |
NT26F6D0, NT26F6D0_EU, NT26F6D0_LA, NT26F6D0_NA |
D series general version |
F6D_B |
EC718PM |
NT26F6D0 |
D series VSIM general version |
F6D_GL |
EC718PM |
NT26F6D0_GL |
D series global version |
F6D_GL_B |
EC718PM |
NT26F6D0_GL |
D series VSIM global version |
F8D_A |
EC718UM |
NT26F8D0 |
D series with 8 MB Flash |
F9D_B |
EC718HM |
NT26F9D0 |
D9 series VSIM general version |
K2B_A |
EC716E |
NT26K2B1, NT26K2B3 |
B series, no full OTA support |
K2E_A |
EC716E |
NT26K2E0, NT26K2E0_0G, NT26K2E1_0G |
E series, no full OTA support |
You only need to specify MODEM and the SDK will automatically match the corresponding MODEMPKG, or you can specify it manually:
make all MODEM=NT26F6D0                        # Auto-match MODEMPKG=F6D_A
make all MODEM=NT26F6D0 MODEMPKG=F6D_A         # Manual specification
5 Command Line Build
5.1 Windows Build
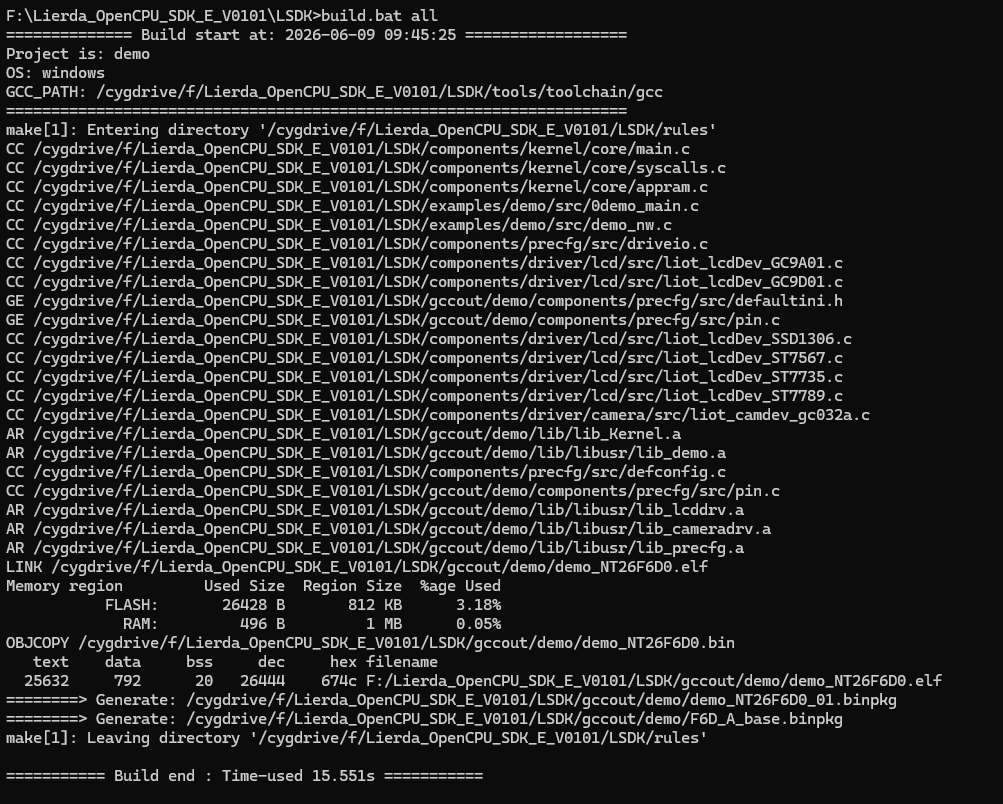
Navigate to the CAT1.bis_OpenCPU root directory and use the build.bat script:
cd CAT1.bis_OpenCPU
./build.bat                # Incremental build
./build.bat all            # Clean build
./build.bat all PROJECT=demo MODEM=NT26F6D0 MODEMPKG=F6D_A  # Build with parameters
5.2 Linux Build
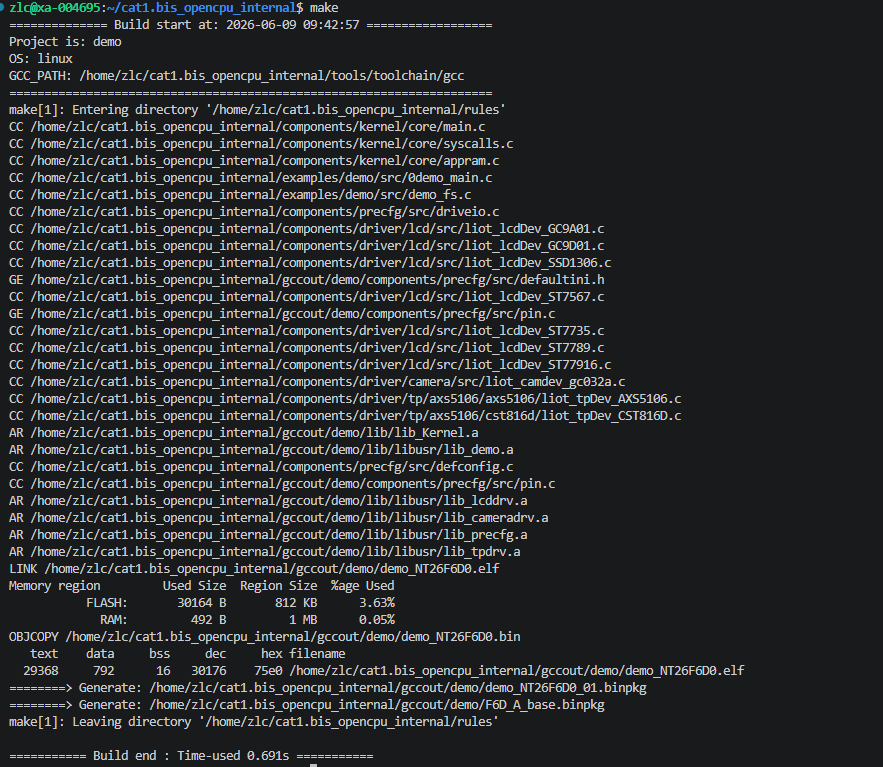
Navigate to the CAT1.bis_OpenCPU root directory and use Make:
cd CAT1.bis_OpenCPU
make                       # Incremental build
make all                   # Clean build
make all PROJECT=demo MODEM=NT26F6D0 MODEMPKG=F6D_A  # Build with parameters
5.3 Build with Parameters
The SDK’s parameter system is based on Makefile variable passing. Any variable in the Makefile can be overridden via command-line arguments.
Common examples:
# Build demo project with FS example
make all PROJECT=demo EXDEMO_FS_EN=y

# Build demo project with OTA upgrade enabled
make all PROJECT=demo BUILD_COMP_OTA_EN=y

# Build demo project with secure boot enabled
make all PROJECT=demo BUILD_COMP_SECBOOT_EN=y
Why doesn’t parameter passing work? All Makefile variables can be passed at build time. However, if a variable is reassigned later in the Makefile (using = or :=), the command-line value will be overridden. Solution: ensure variables use ?= assignment, or use the override keyword.
6 Build Artifacts
After a successful build, the gccout/ directory is generated at the project root, organized by PROJECT name and hardware model. Taking the demo project with NT26F6D0 as an example:
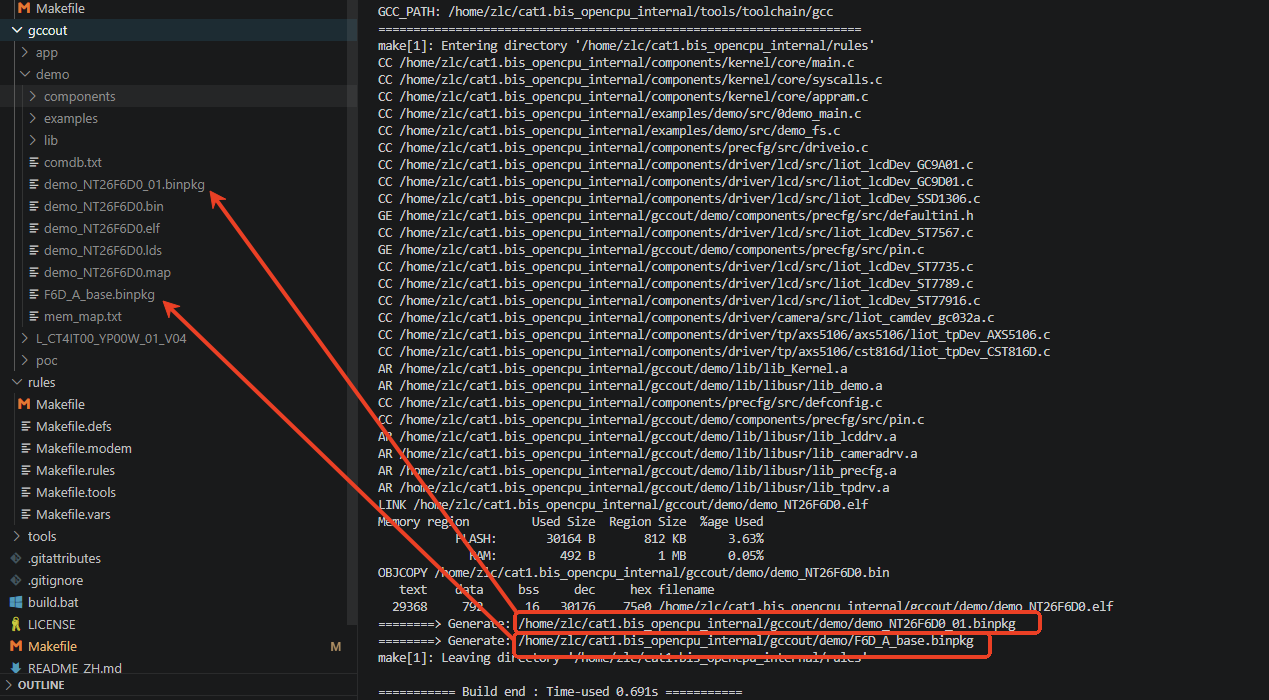
Artifact descriptions:
File |
Description |
|---|---|
|
Combined package (base + application), can be directly flashed using the flashing tool |
|
Application-only package, used for full OTA upgrade, cannot be flashed directly |
|
Application ELF file, used for GDB debugging or crash dump analysis |
|
Base-package-only combined package, can be flashed directly to update the base package alone |
|
Log symbol library, used with the EPAT tool to parse module runtime logs |
The artifact naming convention is $(PROJECT)_$(MODEM)_$(APP_VERSION).binpkg. APP_VERSION is defined in rules/Makefile.defs with a default value of 01, used to identify the application firmware version. It can be modified via build parameters:
make all APP_VERSION=02 # Artifact filename becomes demo_NT26F6D0_02.binpkg
7 Flashing
Flashing is currently only supported on Windows. The flashing tool is lierda_upgrade_tool:
Download: lierda_upgrade_tool_latest.zip
Documentation: Lierda Cellular Firmware Flashing Tool Guide
Note: A command-line flashing tool is under development. Currently, command-line flashing is not supported. Please use the GUI tool to complete flashing.
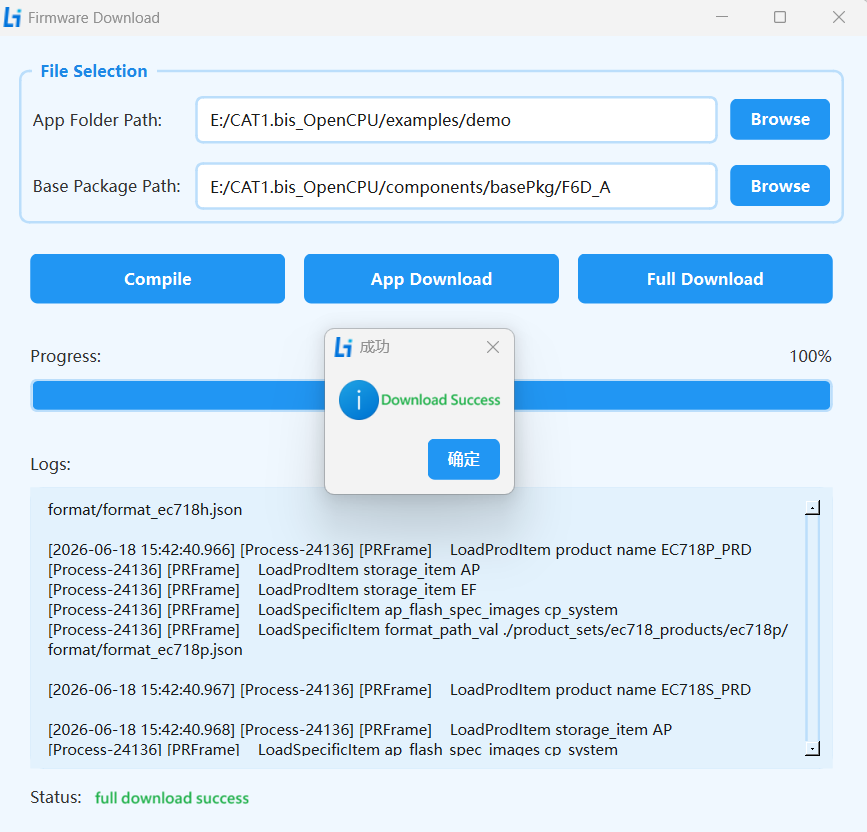
Flashing steps:
Ensure the device is in download mode, or switch to download mode immediately after clicking download.
Click the “Full Download” button. The tool will:
Automatically detect the download port by PID/VID.
Invoke
FlashToolCLIto flash the application firmware.Automatically restart the device after download completes.
8 Advanced Tips
8.1 Cleaning Build Artifacts
make clean                 # Clean current project artifacts (gccout/PROJECT)
make cleanall              # Clean all build artifacts (removes entire gccout/ directory)
8.2 Common Build Combinations
# Quick verification: clean build for app project
make all PROJECT=app MODEM=NT26F6D0 MODEMPKG=F6D_A

# Development/debugging: incremental build (after code changes)
make

# Release build: clean build + OTA
make all PROJECT=app BUILD_COMP_OTA_EN=y
8.3 Working with AI Tools
Command-line development naturally integrates with AI-assisted development tools (such as Claude Code, Cursor, etc.). AI tools can directly invoke build commands and analyze build output to help locate and fix compilation errors.
Recommended workflow:
Use AI tools to write/modify code
Execute build via command line:
make allFeed compilation errors back to AI tools for fixes
Repeat until build passes
Manually use the flashing tool to flash firmware to the device for verification (command-line flashing not yet supported)